![]()
5 Easy Steps to Deep-Clean and Descale Your Cold Press Juicer
A Cleaner Juicer, Better Juice
Get a sparkling, efficient cold press juicer with five straightforward steps that deep-clean buildup, descale mineral deposits, and restore performance safely. No fancy tools required. Clear instructions, timing tips, and simple solutions deliver lasting juice quality results anywhere every day
What You’ll Need
Essential Kit
6-Piece Cold Press Juicer Cleaning Brush Kit

Complete set for slow and masticating juicers
A 6-piece cleaning set designed to reach and clean every part of cold press and masticating juicers, including filters, augers, and feed chutes. Durable brushes and crevice tools remove residue to improve extraction and extend appliance life.
I may earn a commission at no cost to you.
1
Unplug and Disassemble Safely
Skip this and you risk a jam or broken part — don’t be that person.Unplug the juicer and move to a clear, well-lit workspace.
Consult the manual for model-specific disassembly and take photos to remember part order.
Remove the hopper, auger, filter, and collection trays.
Handle sharp or fragile components with care—hold blades by the base, not the edge.
Use a small brush to dislodge pulp before rinsing.
Place removable parts into a basin of warm, soapy water to soak while you prepare cleaning solutions.
Avoid forcing clips or seals; if stuck, consult the manual or a manufacturer video.
Keep small parts together to prevent loss and maintain hygiene.
Work calmly to avoid damage and contamination.
Best Value

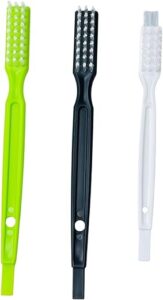
3-Pack Juicer Cleaning Brushes for Omega Models
Compatible with Omega 8003–8006 and VRT350
Three durable dual-end brushes designed to clean filters, crevices, and tight gaps on compatible Omega masticating juicers. Also useful for bottles, blenders, and other hard-to-reach kitchen areas.
I may earn a commission at no cost to you.
2
Pre-Rinse and Remove Residue
Does a quick rinse really make a difference? Absolutely — it saves elbow grease later.Rinse each removable part under warm running water right after disassembly to wash away loose pulp.
Use a soft brush or interdental pick to clear the filter mesh and auger grooves.
Soak parts 5–10 minutes in warm, soapy water to loosen stubborn residue, then brush.
Avoid abrasive pads that scratch surfaces and compromise seals.
Check crevices, spouts, and the feed chute where fibers collect.
Reverse-spin the auger gently by hand if your model allows to dislodge packed material.
Rinse thoroughly to remove soap before descaling.
Pat dry completely before proceeding.
3
Descale with Vinegar or Citric Acid
A simple kitchen acid can extend juicer life — here’s a safe, effective method.Make a descaling solution: one part white vinegar to three parts warm water, or two tablespoons citric acid per liter. Soak removable non-electrical parts for twenty to thirty minutes to loosen mineral deposits.
Brush filters, mesh, and crevices with a soft brush to remove softened scale. If your manual allows, run a small amount of the diluted solution through internal passages to flush hidden buildup, then rinse all parts thoroughly with clean water.
Neutralize odors with a quick baking soda rinse. Wear gloves to protect skin. Air dry parts fully before reassembly to prevent mold or corrosion.
Kitchen Staple
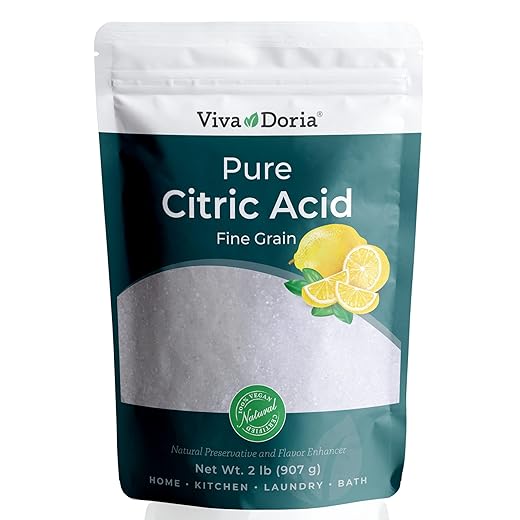
Viva Doria 100% Pure Citric Acid, 2 lb
Food-grade, fine-grain citric acid for cooking
Food-grade citric acid powder for cooking, canning, descaling, and general household use. Fine-grain texture dissolves easily and works as a flavor enhancer or natural cleaner.
I may earn a commission at no cost to you.
4
Deep-Clean Hard-to-Reach Areas
Where does that mystery string of green come from? Targeted tools find it.Tackle tight spots like the feed-chute base, pulp outlet, and spout with targeted tools. Use a soft toothbrush, interdental brush, or flexible pipe cleaner to scrub trapped fibers and deposits—for example, run an interdental brush around the chute rim to dislodge compacted pulp.
Use boiling water only on metal parts to loosen stubborn bits; pour carefully and avoid exposing plastic or sealed components to high heat. Inspect, remove, and clean rubber gaskets; dry thoroughly. Lightly lubricate seals only if the manufacturer advises.
Reassemble once all parts are spotless and fully dry.
Bulk Value
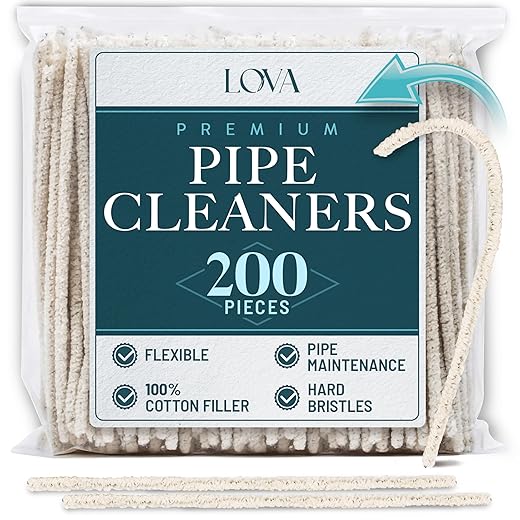
LOVA 200-Pack Hard Bristle 6-Inch Pipe Cleaners
Stiff cotton bristles with flexible steel core
A 200-count pack of 6-inch pipe cleaners with a flexible steel core and firm bristles for deep cleaning tobacco pipes, glass pipes, straws, and narrow tubes. Built to bend into curves without snapping for reliable, frequent maintenance.
I may earn a commission at no cost to you.
5
Final Rinse, Reassembly, and Maintenance Plan
A five-minute habit that prevents hundreds in repairs — make it routine.Rinse every component meticulously under warm running water, ensuring no soap, vinegar, or citric residue remains. Scrub crevices with a soft brush and inspect seals.
Reassemble using your reference photos and the manual. Fit gaskets snugly and secure fasteners; place catch trays and jugs.
Run a short water-only test run to watch operation, detect leaks, or hear abnormal sounds. Dry surfaces and reattach accessories if all runs smoothly.
Establish a maintenance schedule:
Record dates and observations in a notebook or app. Replace worn filters and gaskets promptly. Store parts to dry, avoid bleach, and never use abrasive cleaners that damage seals internally.
Keep It Fresh: Routine Pays Off
Regular deep-cleaning and descaling keep your cold press juicer efficient, hygienic, and long-lasting. Follow these five steps as routine care—quick rinses, targeted scrubbing, descaling, deep cleaning, and maintenance—to enjoy consistent juice quality and fewer repairs over time. Ready to commit?
This post contains affiliate links. Purchases may earn me a commission at no extra cost to you.