![]()
How to Use a Juicer Step-by-Step: Prep, Extract, Clean
Juicing Made Simple: From Prep to Clean
I know juicing can feel overwhelming, but this guide helps you PREP ingredients, EXTRACT juice efficiently, and CLEAN your machine with very easy steps and practical tips for fresh, delicious results every single time.
What You’ll Need
Must-Have
3-Pack Juicer Cleaning Brushes for Omega Juicers

Dual-end heavy-duty bristles for tight crevices
Three sturdy, dual-ended brushes designed to clean masticating juicers (Omega 8003/8004/8005/8006, VRT330/350) and other hard-to-reach areas. Firm nylon bristles and pointed tips remove pulp and residue, while ergonomic handles resist odors for durable everyday use.
I may earn a commission at no cost to you.
1
Prep Produce for Peak Flavor
Want sweeter juice? The right prep makes all the difference — quick hacks to maximize flavor and safety.Select ripe, firm produce and trim any spoiled parts.
Wash everything under running water; scrub root vegetables with a brush and remove wax coatings from apples or pears.
Peel citrus and thick-skinned items as needed, and core apples or pit stone fruit.
Cut produce into pieces that fit your juicer’s feed chute — one to two-inch chunks for centrifugal machines and longer strips for slow masticating models.
Bundle leafy greens with firmer vegetables like cucumber or celery to improve feeding and yield.
Trim and halve hard items such as beets or carrots.
Reserve soft berries and very sweet fruits for partial use to avoid overly syrupy juice.
Chill or briefly freeze fruit pieces if you prefer cold juice; for example, freeze mango slices for 20 minutes to make a refreshing morning drink.
Organize a clean workspace, line up juice and pulp containers, and review your juicer manual for any model-specific safety and assembly steps before powering on.
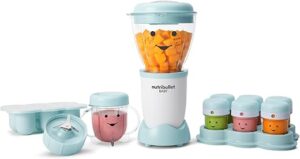
Best for Families
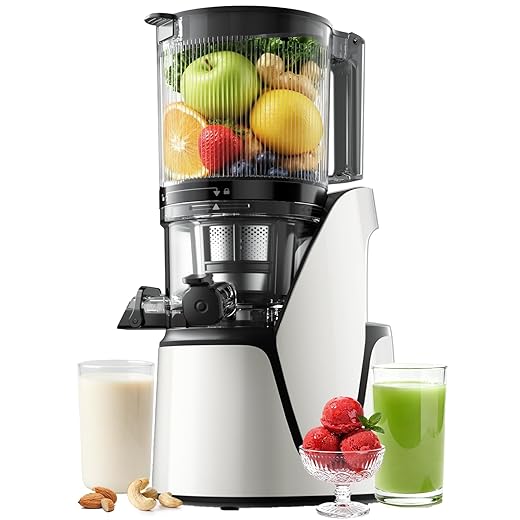
3-in-1 Cold Press Juicer with 100oz Hopper
Large 6.5-inch chute for hands-free juicing
A versatile 3-in-1 cold-press juicer that extracts juice, makes nut milk, and prepares sorbet using interchangeable strainers. The 6.5-inch feed chute and 100oz hopper reduce prep time and refills, while a quiet AC motor and dishwasher-safe parts simplify use and cleaning.
I may earn a commission at no cost to you.
2
Extract Juice Efficiently
Why chasing every last drop matters — squeeze more yield, waste less, and boost nutrition.Assemble the juicer correctly and ensure all safety locks engage before powering on.
Start with firmer ingredients to help push leafy greens through (for example, feed carrot chunks with kale). Alternate soft and hard items — apple, then berry — to improve extraction and reduce clogging.
Use higher speeds on centrifugal models for hard produce and lower speeds for delicate fruits. Feed slowly on masticating machines and avoid overloading; apply steady, gentle pressure and do not force pieces into the chute.
Clear jams by using the reverse function or by shutting down and removing pieces safely. Monitor pulp output and taste the juice; add mild produce like cucumber or a splash of water if too intense. Strain to remove foam if desired, then chill immediately and store in airtight containers up to 48 hours.
Fast Performance

800W Centrifugal Juicer with 3-Inch Chute
High-speed dual-speed motor for fruits and vegetables
An 800W centrifugal juicer featuring a 3-inch wide feed chute and two speed settings to handle both soft and hard produce efficiently. Safety lock, overload protection, and detachable parts make it safe to operate and easy to clean.
I may earn a commission at no cost to you.
3
Clean and Maintain Your Juicer
Skip this and your juicer will beg for retirement — quick cleaning saves money, time, and taste.Turn off and unplug the juicer before disassembling. Remove the pusher, feed chute, hopper, filter basket, auger or blade assembly, and pulp container.
Scrape away large pulp into the trash, then soak removable parts in warm, soapy water for 5–10 minutes to loosen residue. Use the manufacturer’s brush to scrub mesh screens and tight crevices; use a toothbrush for stubborn fibers caught in the mesh. Rinse thoroughly and inspect seals and gaskets for cracks or compression. Check the manual to confirm which plastic pieces are dishwasher-safe.
Wipe the motor base with a damp cloth; never submerge it. Soak parts in a water and baking soda solution or run a vinegar rinse to remove persistent odors. Reassemble only when completely dry to prevent mold. Schedule a monthly deep clean and follow any model-specific maintenance to prolong performance and warranty coverage.
Wrap-Up: Fresh Juice, Less Hassle
Follow these prep, extraction, and cleaning habits to enjoy consistent, flavorful juice, reduce waste, and prolong your juicer’s life—small routines deliver big benefits. Are you ready to start juicing today?
This post contains affiliate links. Purchases may earn me a commission at no extra cost to you.